
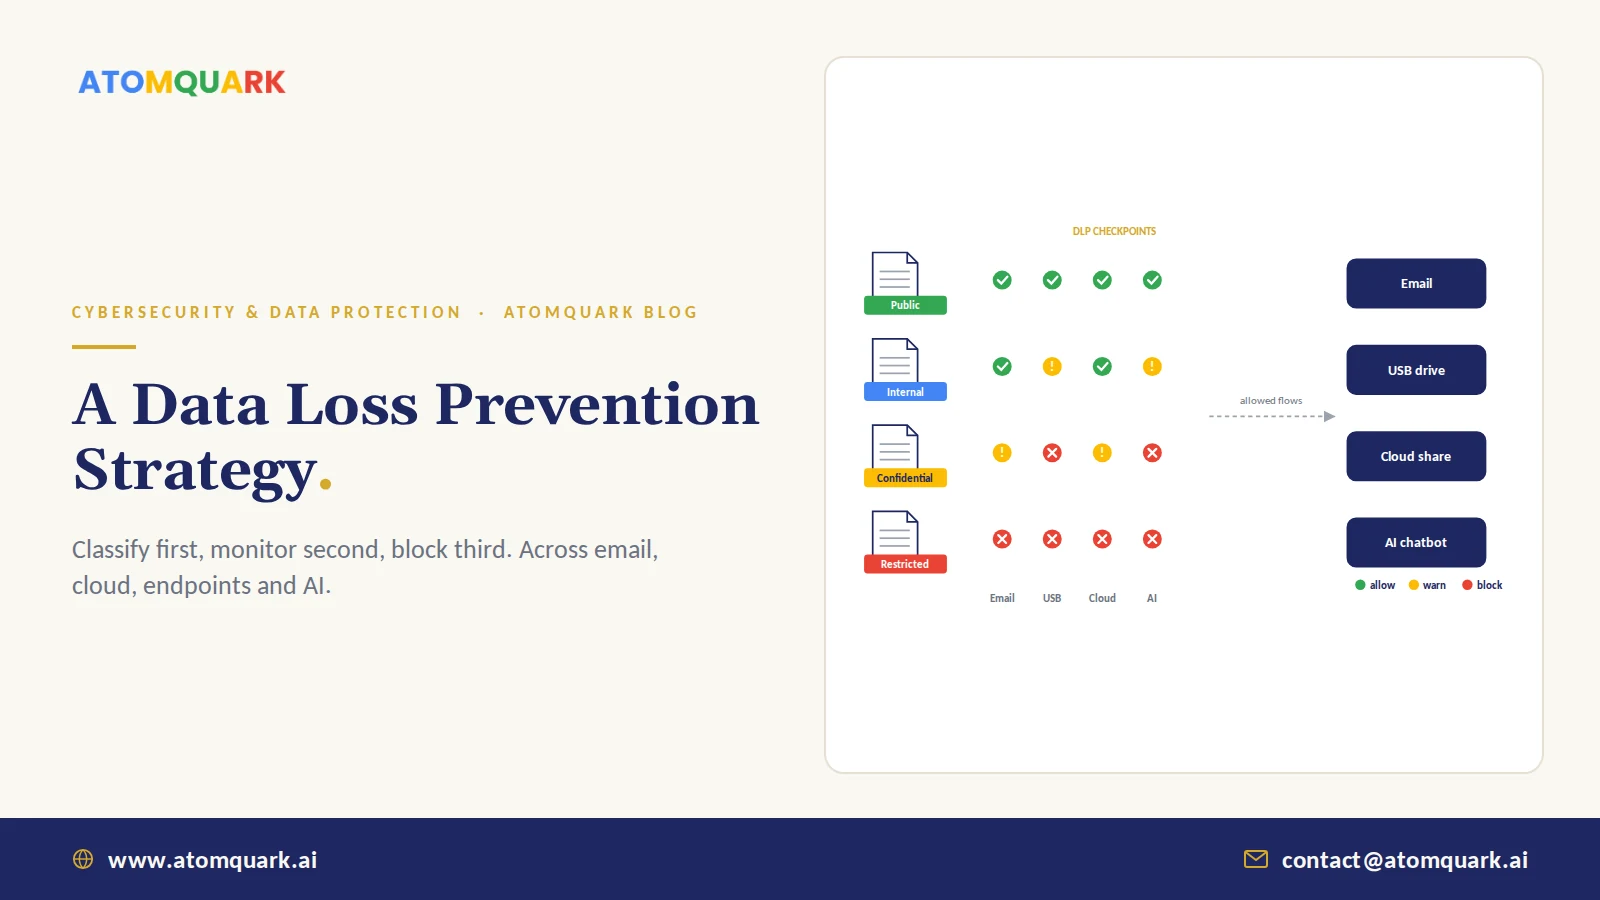
A data loss prevention strategy is an organisation's plan for stopping sensitive information, such as customer records, financial data, source code or contracts, from leaving through channels it shouldn't. It combines data classification, policies, technical controls that detect and block risky movement, and user education. DLP tools inspect content moving through email, cloud apps, endpoints and the web, then allow, warn, encrypt or block based on rules.
Most data leaves by accident. A spreadsheet goes to the wrong "Rahul" in autocomplete. A contract is shared with "anyone with the link." A support engineer pastes a customer log into a public AI chatbot to get help debugging. None of those people are malicious. All of them created a reportable incident.
A good DLP programme catches those moments without making everyone's job miserable.
The order that works: classify your data, monitor how it moves, then start blocking, in that order and not the reverse.
Why a Data Loss Prevention Strategy Matters Now
Three shifts have widened the gaps. Data sits in dozens of SaaS apps rather than one file server. Staff use personal devices and home networks. And generative AI tools have created a new, very convenient exit for sensitive text. Meanwhile, privacy laws such as the EU GDPR and India's Digital Personal Data Protection Act, 2023 put real obligations on how personal data is protected.
Step 1: Classify Your Data
DLP can only protect what it can recognise. Start with a simple scheme of four levels; more than five confuses people.
- Public — Examples: marketing pages, published reports. Typical handling: no restrictions.
- Internal — Examples: policies, internal memos. Typical handling: share within company only.
- Confidential — Examples: customer data, contracts, financials. Typical handling: restricted sharing, encryption, DLP monitoring.
- Restricted — Examples: ID numbers, payment data, health data, source code secrets. Typical handling: strictest controls, block external sharing.
Apply sensitivity labels that travel with the file, so protection follows the document into email, cloud storage and endpoints. Combine automatic labelling (detecting ID numbers, card numbers, keywords) with user labelling for documents only humans can judge.
Step 2: Map Where Data Leaves
List your exit channels and decide which matter most:
- Email: external recipients, personal addresses, large attachments.
- Cloud sharing: public links, external collaborators.
- Endpoints: USB drives, printing, local copies, screenshots.
- Web and SaaS: uploads to personal storage, unsanctioned apps.
- Generative AI tools: prompts pasted into public chatbots.
- Messaging: chat apps and collaboration platforms.
Step 3: Write DLP Policies in Plain Language
Each policy should state what data, which channel, what action. For example: "Confidential documents shared with external email addresses trigger a warning and require a business justification. Restricted data sent externally is blocked and the security team is notified."
Start with a short list of high-value policies rather than a hundred rules that generate noise.
Step 4: Roll Out in Monitor Mode First
Run new policies in audit-only mode for a few weeks. You'll find false positives, legitimate business flows you didn't know about, and the real hot spots. Then move to user warnings ("policy tips") that educate in the moment. Block only where the risk is clear and the false-positive rate is low.
Step 5: Protect Data on BYOD and Mobile
Personal phones are part of the workplace. App protection policies (MAM) can protect company data inside managed apps, blocking copy-paste to personal apps, requiring a PIN and wiping company data only, without managing the whole personal device. This sits naturally alongside endpoint MDM for company-owned devices.
Step 6: Handle Generative AI Deliberately
Banning AI tools rarely works; people use them on their phones instead. A better approach:
- Provide an approved, enterprise-grade AI tool where data isn't used for training, or a private, on-premise AI option for sensitive work.
- Use DLP and web controls to warn or block when labelled confidential data is pasted into unapproved AI sites.
- Make the rules part of your AI governance framework and train staff on them.
Step 7: Monitor, Investigate and Improve
Send DLP alerts into your SIEM so they're correlated with identity and endpoint signals. A DLP alert from an account that also signed in from an unusual country is far more urgent than one on its own. Review metrics monthly: incidents by channel, false-positive rate, and repeat offenders who need training.
DLP Mistakes to Avoid
- Blocking on day one. Business stops, users revolt, and policies get switched off.
- Too many labels. Nobody remembers the difference between seven levels.
- Ignoring identity. DLP is weaker if accounts are compromised, so pair it with strong identity and access management.
- No owner. Alerts with no one assigned to review them are just noise.
Practical Example: A First 90 Days of DLP
An illustrative plan for a company of a few hundred people that handles customer personal data:
Days 1 to 30: Classify and observe.
- Publish the four-level classification scheme with one-line examples for each level.
- Turn on automatic labelling for obvious patterns such as national ID numbers, card numbers and bank details.
- Deploy DLP policies in audit-only mode for email and cloud sharing.
Days 31 to 60: Educate in the moment.
- Review the audit data: which teams send confidential data externally, and why?
- Whitelist legitimate flows, for example payroll files to the payroll provider.
- Switch the top three policies to user warnings with a short explanation and a justification box.
- Add warnings for pasting labelled data into unapproved AI tools, and announce the approved alternative.
Days 61 to 90: Enforce where it's clear.
- Block Restricted data to personal email domains and public sharing links.
- Apply app protection to company data on personal phones.
- Route high-severity DLP alerts into the SIEM and assign an owner.
By day 90 the organisation knows where its sensitive data actually moves, users have been nudged rather than ambushed, and blocking applies only where false positives are rare.
Conclusion
Data loss prevention works when it's built in layers: classification first, visibility second, enforcement third, with generative AI treated as a real channel rather than an afterthought. The goal isn't to stop people working. It's to make the safe way to share data the default way.
Atomquark's SecureShield includes data classification and sensitivity labels, DLP policies and BYOD app protection as part of its managed Zero Trust service. Book a data protection assessment to find where your sensitive data is leaving today.
Frequently Asked Questions
What is data loss prevention?
Data loss prevention is a set of policies and tools that detect and stop sensitive data from being shared, copied or sent outside approved channels, through email, cloud apps, endpoints, web uploads or AI tools.
How does DLP software work?
DLP software inspects content using patterns, keywords, sensitivity labels and fingerprints, then applies policy actions such as allowing, warning the user, requiring justification, encrypting or blocking the transfer.
What are the main data classification levels?
Most organisations use four levels: Public, Internal, Confidential and Restricted. Each level has defined handling rules for sharing, storage and encryption.
How can I stop employees pasting sensitive data into public AI chatbots?
Provide an approved enterprise AI tool, use DLP and web filtering to warn or block when sensitive data is pasted into unapproved AI sites, and publish clear acceptable-use rules with staff training.
Should DLP policies start in block mode?
No. Start in monitor mode to understand data flows and reduce false positives, then use user warnings, and enforce blocking only where risk is clear and accuracy is proven.
Does DLP work on personal devices?
Yes, through app protection policies that secure company data inside managed apps on personal devices, without taking control of the entire device or the user's personal data.